How to Roll a Joint: A Step-by-Step Guide for Beginners
Learning how to roll a joint is a skill many people want to master. If you are new, don’t worry. Rolling a joint is not hard when you break it down into simple steps. This step-by-step guide on how to roll a joint is made for beginners and written in easy-to-read language.
A joint is one of the most popular ways people enjoy weed. It is simple, classic, and does not need fancy tools. All you need is weed, rolling paper, and a little patience. By the end of this guide, you will know how to roll a joint step by step, even if you have never tried before.
This article will walk you through everything. You will learn what tools you need, how to prepare your weed, how to roll it, and how to fix common mistakes. Let’s get started.
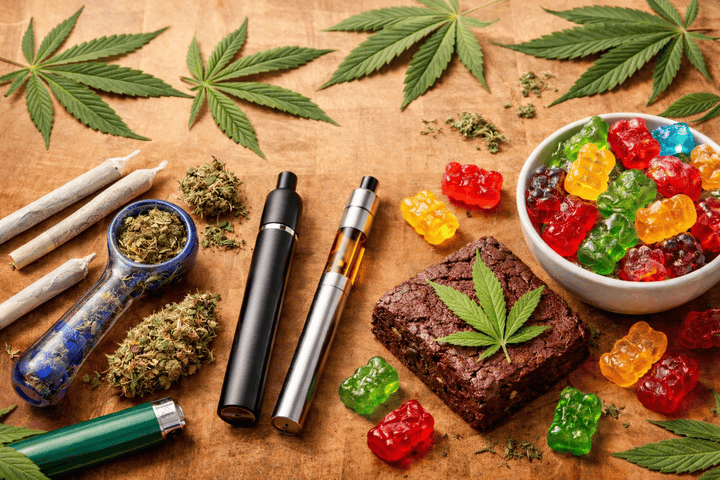
Did you know that you can buy cannabis products online at Medicineman’s Dispensary. They do not sell Delta-8 or related items. They sell real cannabis with real THC! They also sell vapes, concentrates and other cannabis related products.
What Is a Joint?
A joint is weed rolled inside thin rolling paper. It looks like a small cone or cigarette. People light one end and gently inhale from the other end.
Joints have been around for many years. They are simple and easy to share. Unlike pipes or bongs, joints do not need cleaning. When it is done, it is done.
Knowing how to roll a joint gives you more control. You decide how much weed goes inside and how it burns.
Why Learn How to Roll a Joint?
There are many reasons to learn how to roll a joint step by step:
-
You do not need special tools
-
It is easy to carry
-
It burns evenly when rolled right
-
It is a classic weed experience
Rolling your own joint can also save money. Pre-rolled joints cost more than rolling your own weed.
What You Need to Roll a Joint
Before you begin, gather everything you need. Having your tools ready makes rolling easier.
Basic Supplies
-
Weed (also called cannabis, but we’ll say weed)
-
Rolling papers
-
A grinder or your fingers
-
A clean, flat surface
Optional Supplies
-
Filter tip or crutch
-
Rolling tray
-
Small stick or pen
You do not need fancy supplies. Simple tools work just fine when learning how to roll a joint for beginners.
Step 1: Choose the Right Rolling Papers
Rolling papers come in different sizes and materials. Beginners should use standard-size papers.
Some papers are made from:
-
Rice
-
Hemp
-
Wood pulp
Thinner papers burn slower. Thicker papers are easier to roll. If this is your first time learning how to roll a joint, thicker papers may help.
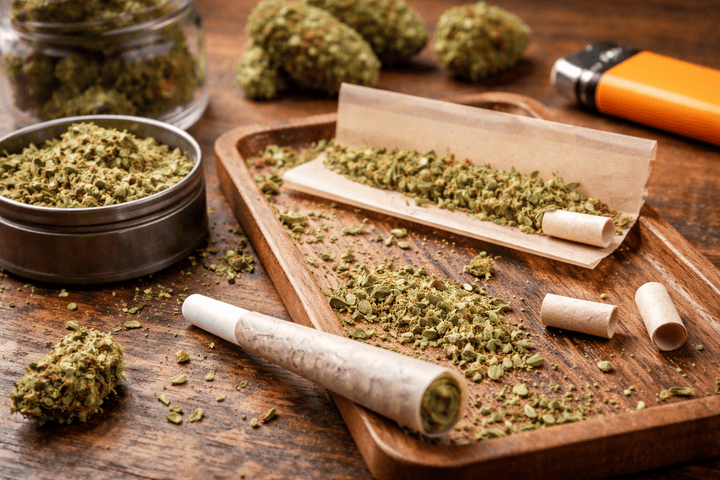
Step 2: Prepare Your Weed
This step is very important. Preparing your weed the right way helps the joint burn smoothly.
Break Up the Weed
Use a grinder if you have one. If not, gently break the weed apart with your fingers. Do not make it into powder. Small, fluffy pieces work best.
Avoid using stems or seeds. They can poke holes in the paper and cause uneven burning.
Prepared weed helps when learning how to roll a joint step by step.
Step 3: Make a Filter (Optional but Helpful)
A filter, also called a crutch, goes at the mouth end of the joint. It helps in many ways:
-
Keeps weed from getting in your mouth
-
Gives the joint structure
-
Makes it easier to hold
You can make a filter using thick paper like a business card or filter tip paper.
Fold it into a small “W” shape, then roll it into a tight circle.
While filters are optional, they make rolling joints much easier for beginners.
Step 4: Set Up the Rolling Paper
Hold the rolling paper with the glue strip facing up and toward you. The sticky part should be on the top edge.
Place the filter on one end of the paper. This will be the mouthpiece side.
Next, sprinkle your weed evenly along the paper. Put a little more weed in the center than at the ends. This helps make a smooth shape.
This setup is key when learning how to roll a joint correctly.
Step 5: Shape the Joint
Now comes the shaping part. This step helps form the joint before rolling.
Use your thumbs and fingers to gently roll the paper back and forth. This packs the weed into a tube shape.
Do not squeeze too hard. Be gentle. You are shaping, not crushing.
Many beginners skip this step, but it makes rolling much easier.
Did you know that you can buy cannabis products online at Medicineman’s Dispensary. They do not sell Delta-8 or related items. They sell real cannabis with real THC! They also sell vapes, concentrates and other cannabis related products.
Step 6: Roll the Joint
This is the main step in how to roll a joint step by step.
Once the weed is shaped:
-
Tuck the non-glue side of the paper around the weed
-
Roll upward toward the glue strip
-
Lick the glue lightly
-
Finish rolling and seal the paper
Take your time. Rolling too fast can cause mistakes.
If it does not look perfect, that is okay. Practice makes better joints.
Step 7: Pack the Tip and Close the End
Once the joint is rolled, you may see loose weed at the open end.
Use a pen, stick, or small tool to gently pack the weed down from the top. This helps it burn evenly.
Twist the top closed or fold it down. Your joint is now ready.
You have officially learned how to roll a joint!
Step 8: Check the Joint
Before lighting, do a quick check:
-
Is it too tight? Air should flow through
-
Is it too loose? Weed should not fall out
-
Is the paper sealed?
If something feels off, gently adjust it.
A good joint should feel firm but not hard.
Common Joint Rolling Mistakes
Everyone makes mistakes when learning how to roll a joint for the first time. Here are some common ones:
Rolling Too Tight
If the joint is too tight, it will be hard to inhale. Loosen it gently by rolling it between your fingers.
Rolling Too Loose
Loose joints burn unevenly. Pack the weed down gently to fix this.
Uneven Weed Distribution
Weed should be spread evenly. Lumpy joints burn poorly.
Mistakes are part of learning. Do not get frustrated.
Different Joint Styles
Once you learn the basics, you can try different styles.
Straight Joint
This is the easiest style. It looks like a cigarette and is great for beginners.
Cone Joint
Cone joints are wider at the top and narrow at the filter. They hold more weed and burn slowly.
Inside-Out Joint
This style uses less paper and burns cleaner. It is better for advanced rollers.
Master the basics before trying fancy styles.
Tips for Rolling Better Joints
Here are some easy tips to improve your joint rolling skills:
-
Use fresh rolling papers
-
Grind weed evenly
-
Roll slowly and gently
-
Practice often
-
Do not overfill
The more you practice how to roll a joint, the better you will get.
How Long Does It Take to Learn?
Most people can roll a decent joint after a few tries. It may not look perfect at first, but it will work.
After a week of practice, many beginners feel confident. After a month, rolling a joint can feel natural.
Remember, everyone starts somewhere.
Why Rolling Your Own Joint Is Worth It
Learning how to roll a joint step by step gives you freedom. You do not need pre-rolls or machines.
You also connect more with the weed you are using. Many people enjoy the rolling process as part of the experience.
Rolling your own joint can be relaxing and rewarding.
Final Thoughts on How to Roll a Joint
Rolling a joint is a simple skill that anyone can learn. You do not need to be perfect. You just need patience and practice.
This step-by-step guide on how to roll a joint was made to be easy, clear, and friendly for beginners. Follow the steps, take your time, and enjoy the process.
With a little effort, you will be rolling smooth, even joints in no time.
SEO Phrases List
-
how to roll a joint
-
how to roll a joint step by step
-
step by step guide on how to roll a joint
-
how to roll a joint for beginners
-
easy way to roll a joint
-
beginner guide to rolling a joint
-
rolling a joint step by step
-
best way to roll a joint
-
how to properly roll a joint
-
simple joint rolling guide
-
learn how to roll a joint
-
joint rolling tips for beginners
-
how to roll weed into a joint
-
joint rolling tutorial
-
classic weed joint rolling guide